by Steve Cunningham
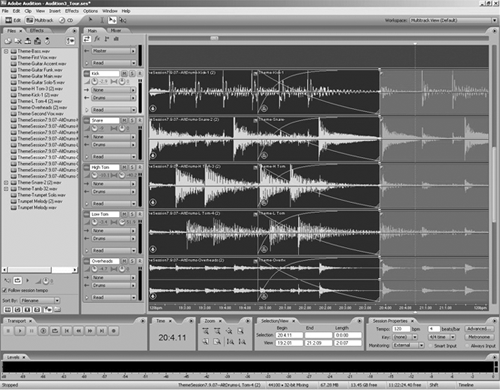
To say that Adobe’s Audition is a staple of radio production would be an understatement. Audition has been a favorite since it was Cool Edit and Cool Edit Pro, and we’ve looked at that product several times in its various incarnations. Adobe has continued developing Audition, and released Audition version 3 in mid-November 2007. While it’s not groundbreaking, Audition 3 offers a group of useful new features that will be greatly appreciated by production folks, at less than a hundred bucks for the upgrade.
I’ve been using Audition 1.5 since Adobe released it, and did not install version 2 because it required Windows XP with Service Pack 2, and I was still using Windows 2000. So it’s high time I got with the program, don’t you think? Let’s take a look.
INSTALLING THE UPGRADE
The version 3 installation process works like previous versions, and I encountered nothing out of the ordinary. If you’re upgrading from version 1.0, 1.5, or 2.0 and you don’t have the old copy installed, be prepared to enter the serial number of the old version during the install process (when you do, you’ll get a very small dialog box that just says “Upgrade” and has an OK button. That made me laugh). After you install it, you have 30 days to use the product before you must activate it. It was here that I found the only weirdness — when I tried to decline activation because I’m not sure about on which machine I want it to live, it told me that my 30-day period had expired, then went on to launch anyway. Go figure.
Audition needs about 750MB of disk space for the basic program. It comes with about five gigabytes of audio loops, marketed as Loopology, which I did not install. It still requires XP with Service Pack 2 in either the Home or Pro version, and while Audition remains a 32-bit application, it runs in Vista’s 64-bit environment. Adobe recommends a minimum 1.4GHz Pentium 4 processor, but if you want high performance you’ll need a 2.8 or 3GHz Pentium or perhaps a Dual Core processor and a couple of gigabytes of RAM. Those of you with Dual Core boxes will be glad to know that Audition likes multiple processors, and will use all the cores you have available for better performance. As with previous versions, Audition 3 handles every audio file format you might ever want to edit, including such oddballs as Amiga (.iff) and Dialogic VOX (.vox), and more standard formats including Windows Media.
I should also mention that I installed Audition on two computers (Adobe does let you do that, so long as you’re only using one at a time.) In addition to installing it on a Windows XP PeeCee, I also installed it on my MacBook Pro which has Windows XP SP2 running under the Parallels software program. For those of you who have Intel-based Macintosh computers, I can tell you that Audition runs just fine, although I have yet to get the ASIO drivers for any of my interfaces working with XP under Parallels. I’ll let you know when I do, but meanwhile Audition is happily talking to the MBP’s built-in audio in and out, and the latency is tolerable. The performance is not quite up to that of my Pentium 4 machine, but I’ve recorded and edited complete eight track promos with it, and even ran a few real-time plugs. It’s okey-dokey.
 WHAT’S NEW
There’s no one earth-shattering new feature here, but there are a lot of small things that really add up. Most of them have to do with audio editing, which should make a lot of Audition users happy.
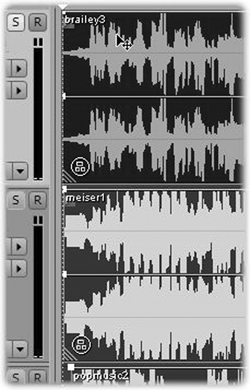
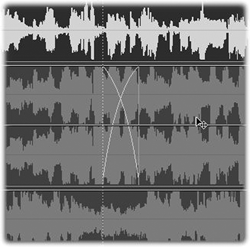
Audition now allows audio clips to be grouped in the Multitrack view. These clips can exist on different tracks, and when grouped, each displays a small group icon in the lower left corner, and also assume a single color. You can then perform cut, copy, paste, fade, mute, and lock operations to multiple tracks in one go. You can also trim or extend the length of grouped clips simultaneously, assuming you have some audio to extend. Grouped clips can be discontiguous, so you can select just some clips on a single track, or multiple clips on multiple tracks. Once grouped, most edit operations you perform on one will be performed on all members of the group.
Audition’s Spectral editing has been both improved and expanded, with the Spectral Frequency display now joined by Spectral Pan and Spectral Phase views in the Edit window. The Spectral Pan display shows the left right stereo position of every frequency in an audio file, so you can visualize the sound locations in the stereo field. The x axis (horizontal ruler) measures time and the y axis (vertical ruler) measures pan position, with the top of the display representing full left and the bottom of the display representing full right. Brighter colors represent louder audio signals.
The Spectral Pan display works well along with the Center Channel Extractor effect. This effect lets you boost or cut frequencies that are common to both the left and right channels. If the audio you want to work on is off center, you can use Spectral Pan Display to determine its actual position and enter that value in the Center Channel Extractor to improve the quality of the results.
The Spectral Phase display shows the phase difference in degrees between the left and right channels. For example, if any frequency is 180° out of phase, Spectral Phase Display shows bright patches near the +/ 180° marks. This display gives you a good double-check on your phase information, which of course is important for mono compatibility.
The Spectral Frequency display lets you edit specific frequencies without disturbing others in the clip, and has become a personal favorite of mine for eliminating hum, buzz, pops, and clicks. Audition’s tools are more comprehensive than those in Sony’s Sound Forge 9, in that you can click-drag select using the square Marquee tool, or work freestyle with the new Lasso tool. Also new and very cool is the Effects Paintbrush, which works a bit like the paintbrush in Photoshop. Where the Marquee and Lasso tools let you select a frequency range at 100% intensity only, the Effects Paintbrush not only selects a range but also the intensity with which an effect is applied. The more you “brush” an area, the whiter it becomes in the display, and the more intense the effect will be when you apply it.
A near cousin of the Effects Paintbrush is the Spot Healing Brush. See, the thing I really like about spectral editing is that often it’s easier to locate a click, pop, or other nasty by looking than by listening, especially with a spectral view of the sound file, where it may show as a bright-colored blip. The Spot Healing Brush also has roots in Photoshop, and it allows you to smoothly “paint out” the offending pop or crackle without trashing the rest of the audio in that area.
Also in the noise-reduction category is Audition’s new Adaptive Noise Reduction plug-in. This VST plug-in removes variable broadband noise such as background sounds, rumble, and wind. Because it’s a VST plug, you can combine it with other effects in the Mastering Rack and Effects Rack and apply it to tracks in Multitrack View in real time. By contrast, the standard Noise Reduction effect is available only as an offline process in Edit View. The standard Noise Reduction plug is sometimes more effective at removing constant noise like hiss or hum, but the Adaptive plug’s ability to work in real time makes it a winner.
WORKING THE ENDS
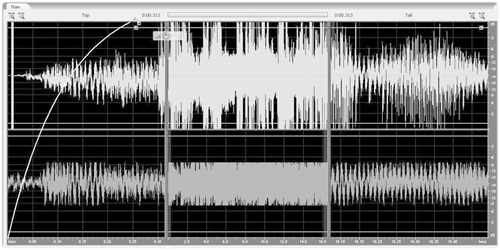
One of my favorite new tools is the Top/Tail View. Adobe intended this for musicians who create audio loops, but it turns out to be a very quick method for performing an audio edit that most of us use several times a day.
With a sound clip loaded in the Edit view, pressing 7 changes the view to Top/Tail. It splits the screen into three sections: on the left is the first ten seconds of the file, in the center is the entire file, and on the right is the last ten seconds of the file (the ten-second length is the default, and it can be changed with a visit to Preferences). The overview ruler that normally extends the length of the Edit window now occupies only the center pane of the window, but it still works the same way. Atop the left and right panes are icons for zooming in and out of the top and the tail sections. By default these are linked, but they can be unlinked in the Preferences section.
From here you can easily trim and fade the beginning and end of the audio without having to scroll through the entire file. There a small gray Fade handles are visible in the upper left and right corners of the waveform view, and dragging them toward the center generates a fade that extends as far as you drag the handles. While dragging, you can move the handles up and down to create linear, log, or inverse log fades. Believe me it takes much longer to describe it than to actually do it.
Hitting the space bar in Top/Tail view causes the sound file to play a loop that includes both the visible top and the visible tail, but not all the audio in-between. While designed for checking loop points, for our purposes it’s a quick check on our top/tail edits.
 NEW EFFECTS
Audition 3 comes with a few new effects as well. There’s a nice-sounding Convolution Reverb, which simulates actual physical spaces using impulse response files recorded in those actual spaces. It has a much more interesting sound than the other reverbs that come with Audition, although the “interesting” part is dependent on the impulse response files you use with it. It’s not Altiverb, but it is a definite improvement.
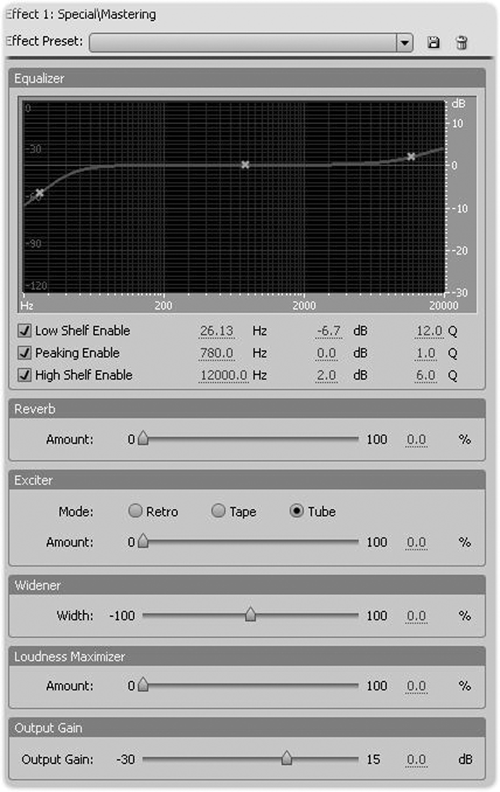
There’s also a new Mastering plug, which includes a three-band EQ, a reverb, an audio exciter and a stereo “widener”, along with a loudness maximizer and output gain control. I’m gonna try using this thing to simulate an FM processing chain so I can get a real feel for how my spots will sound while I’m editing them, and I’ll let you know how that experiment works out.
Adobe has again teamed up with software plug developer iZotope, and this time the company has licensed iZotope’s Radius time-stretching technology for Audition 3. In my opinion the Radius algorithms create the best-sounding and least obtrusive time-stretching available anywhere... they really are good, and generate few artifacts even at extreme amounts of stretch or shrink. Believe me, if you do old-school car commercials you’ll be happy with Audition’s time-stretch. In addition, several of iZotope’s compressors that were part of Audition 2 remain in version 3. These are far more musical-sounding than the native Adobe compressors to my ear. Combined with Radius time-stretch, Audition 3 will produce blather-filled car spots quicker — all that’s missing is the sales blather (as we know, the client provides that).
WORTH THE BUCKS?
Okay, so here’s the sixty-four-dollar question: is this upgrade worth the money?
Yes, I think so. The new stuff is remarkably useful... there’s little fluff here. The basics are unchanged, and I promise that if you’re an Audition user you will have no trouble getting around on version 3. And while Audition 3 is certainly not any snappier in performance than Audition 2, its overall performance seems unchanged, and the new goodies haven’t slowed it down.
There are a few new features that I didn’t bother to mention because the production community will seldom use ‘em — VSTi software instruments, enhanced MIDI functions, and that sort. But there are enough useful tools here to make this a worthwhile upgrade, particularly at the $99 upgrade price. C’mon, you can get that much out of your Sales Manager’s petty cash box, can’t ya?
Adobe Audition 3 carries a suggested retail price of $349 in the US; upgrades from previous versions retail at $99. For more information worldwide, visit www.adobe.com/products/audition.

